Introduction Link to heading
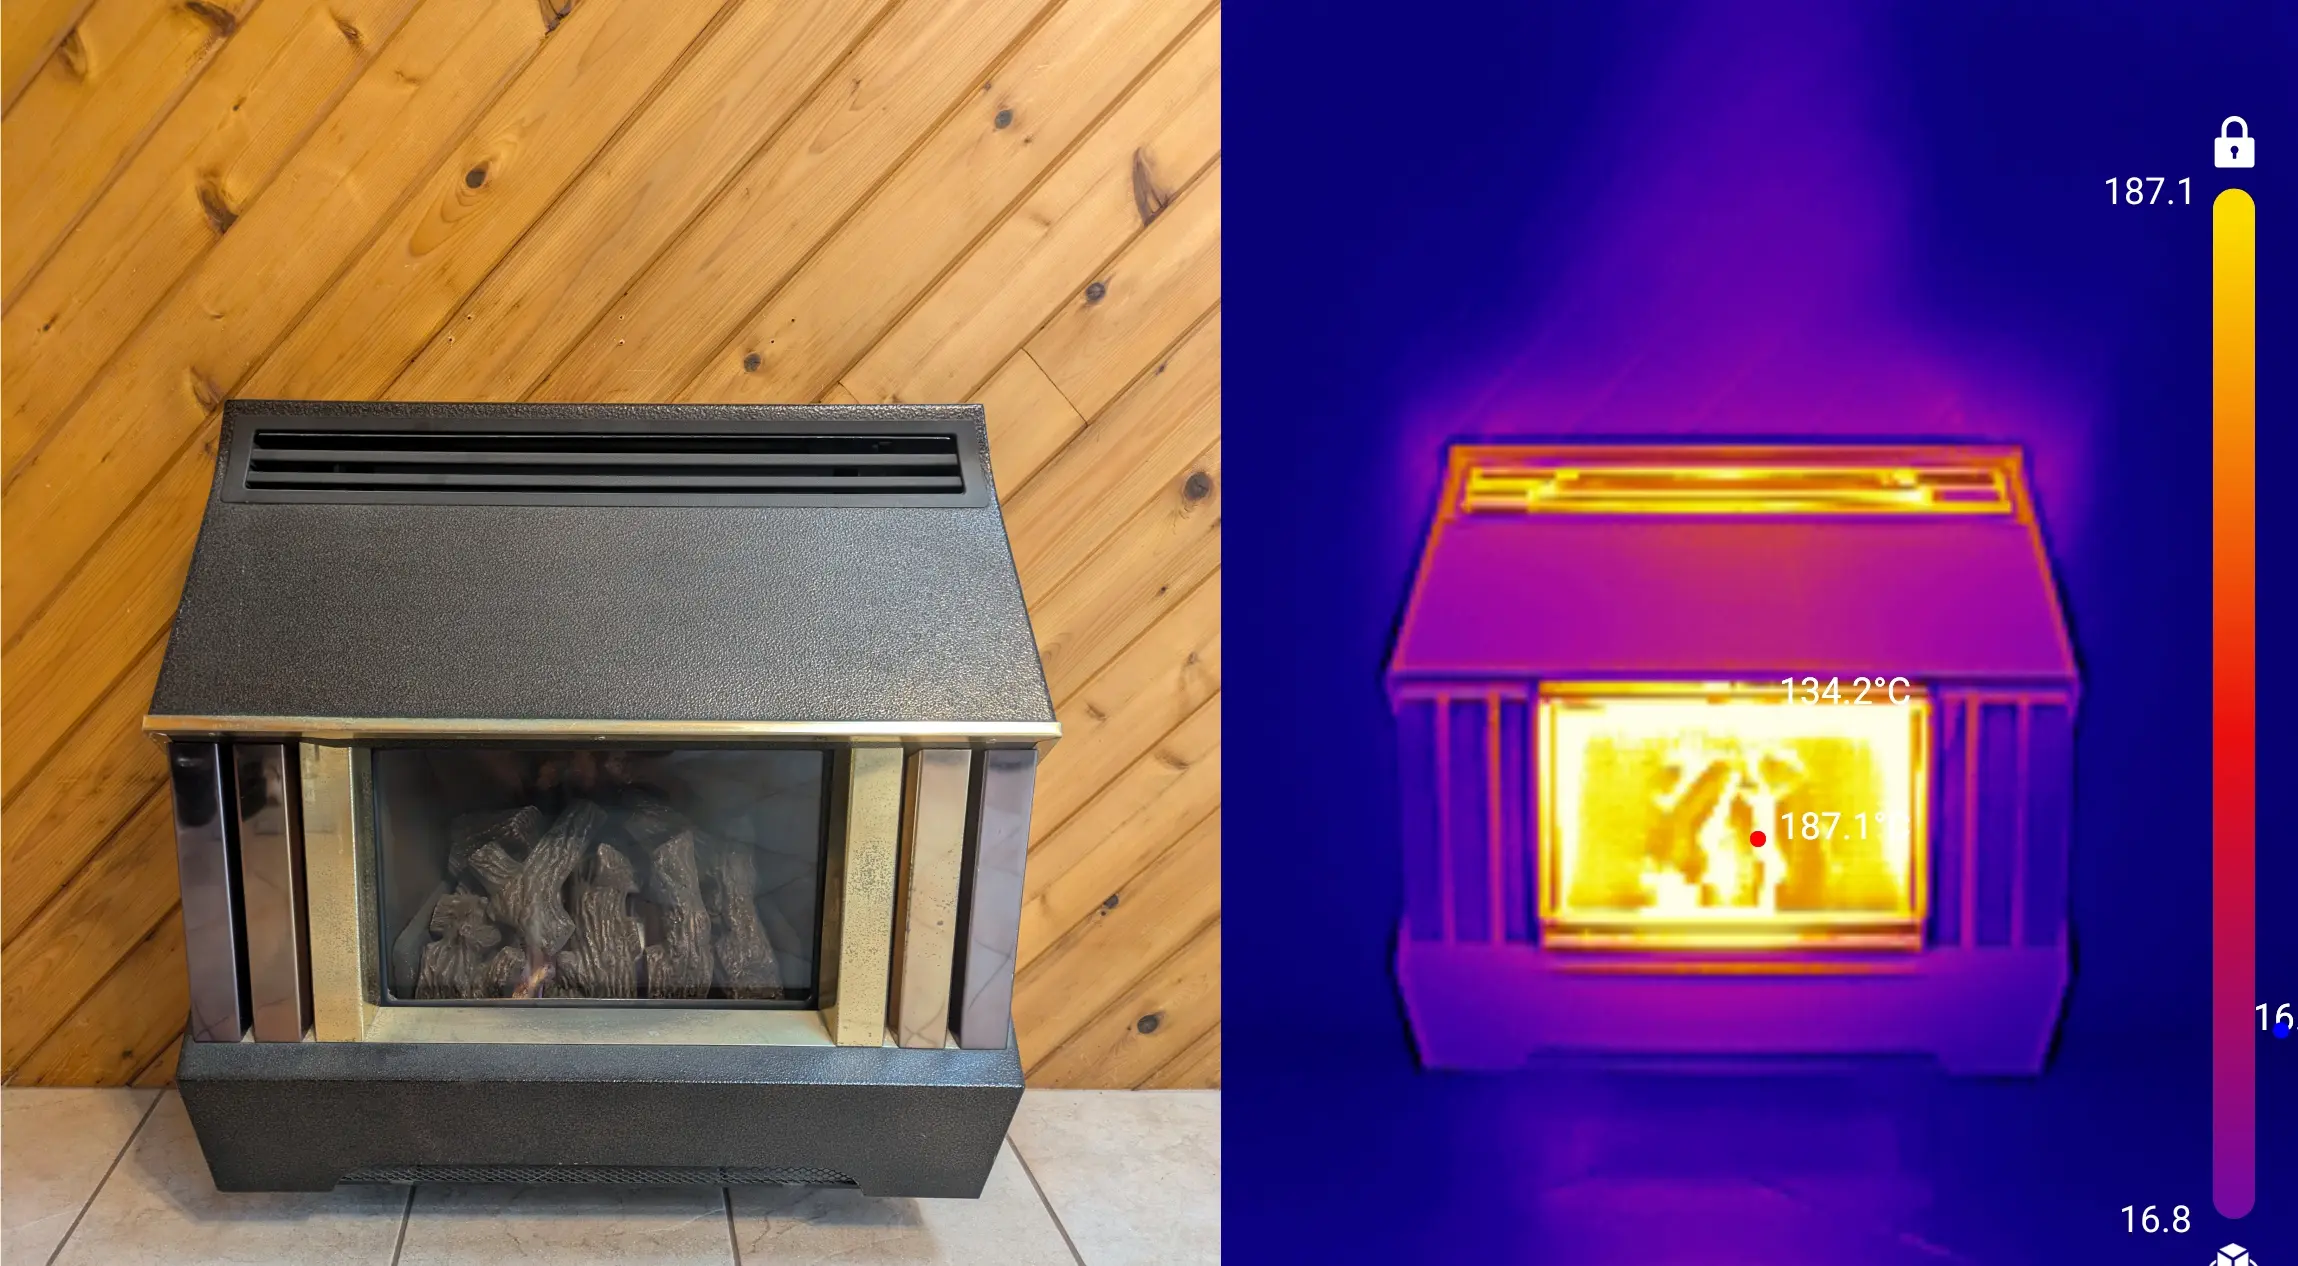
As the winter is approaching, I wanted to improve the effectiveness of my 30+ year old direct vent natural gas fireplace. It’s a Valor 480CN, and it was installed to heat a sunroom addition to the house, built sometime in the mid 1990s. There remainder of the house is heated by a forced air system, but the sunroom is not connected to that system. I really like the sunroom, but it just gets pretty cold in the winter.

As you can see from the thermal image, the unit puts out a lot of heat, but it’s concentrated at the top and does not get circulated around the room very well. That leads to the room being very warm in the corner where the fireplace is but at least a few degrees colder on the other side of the room.
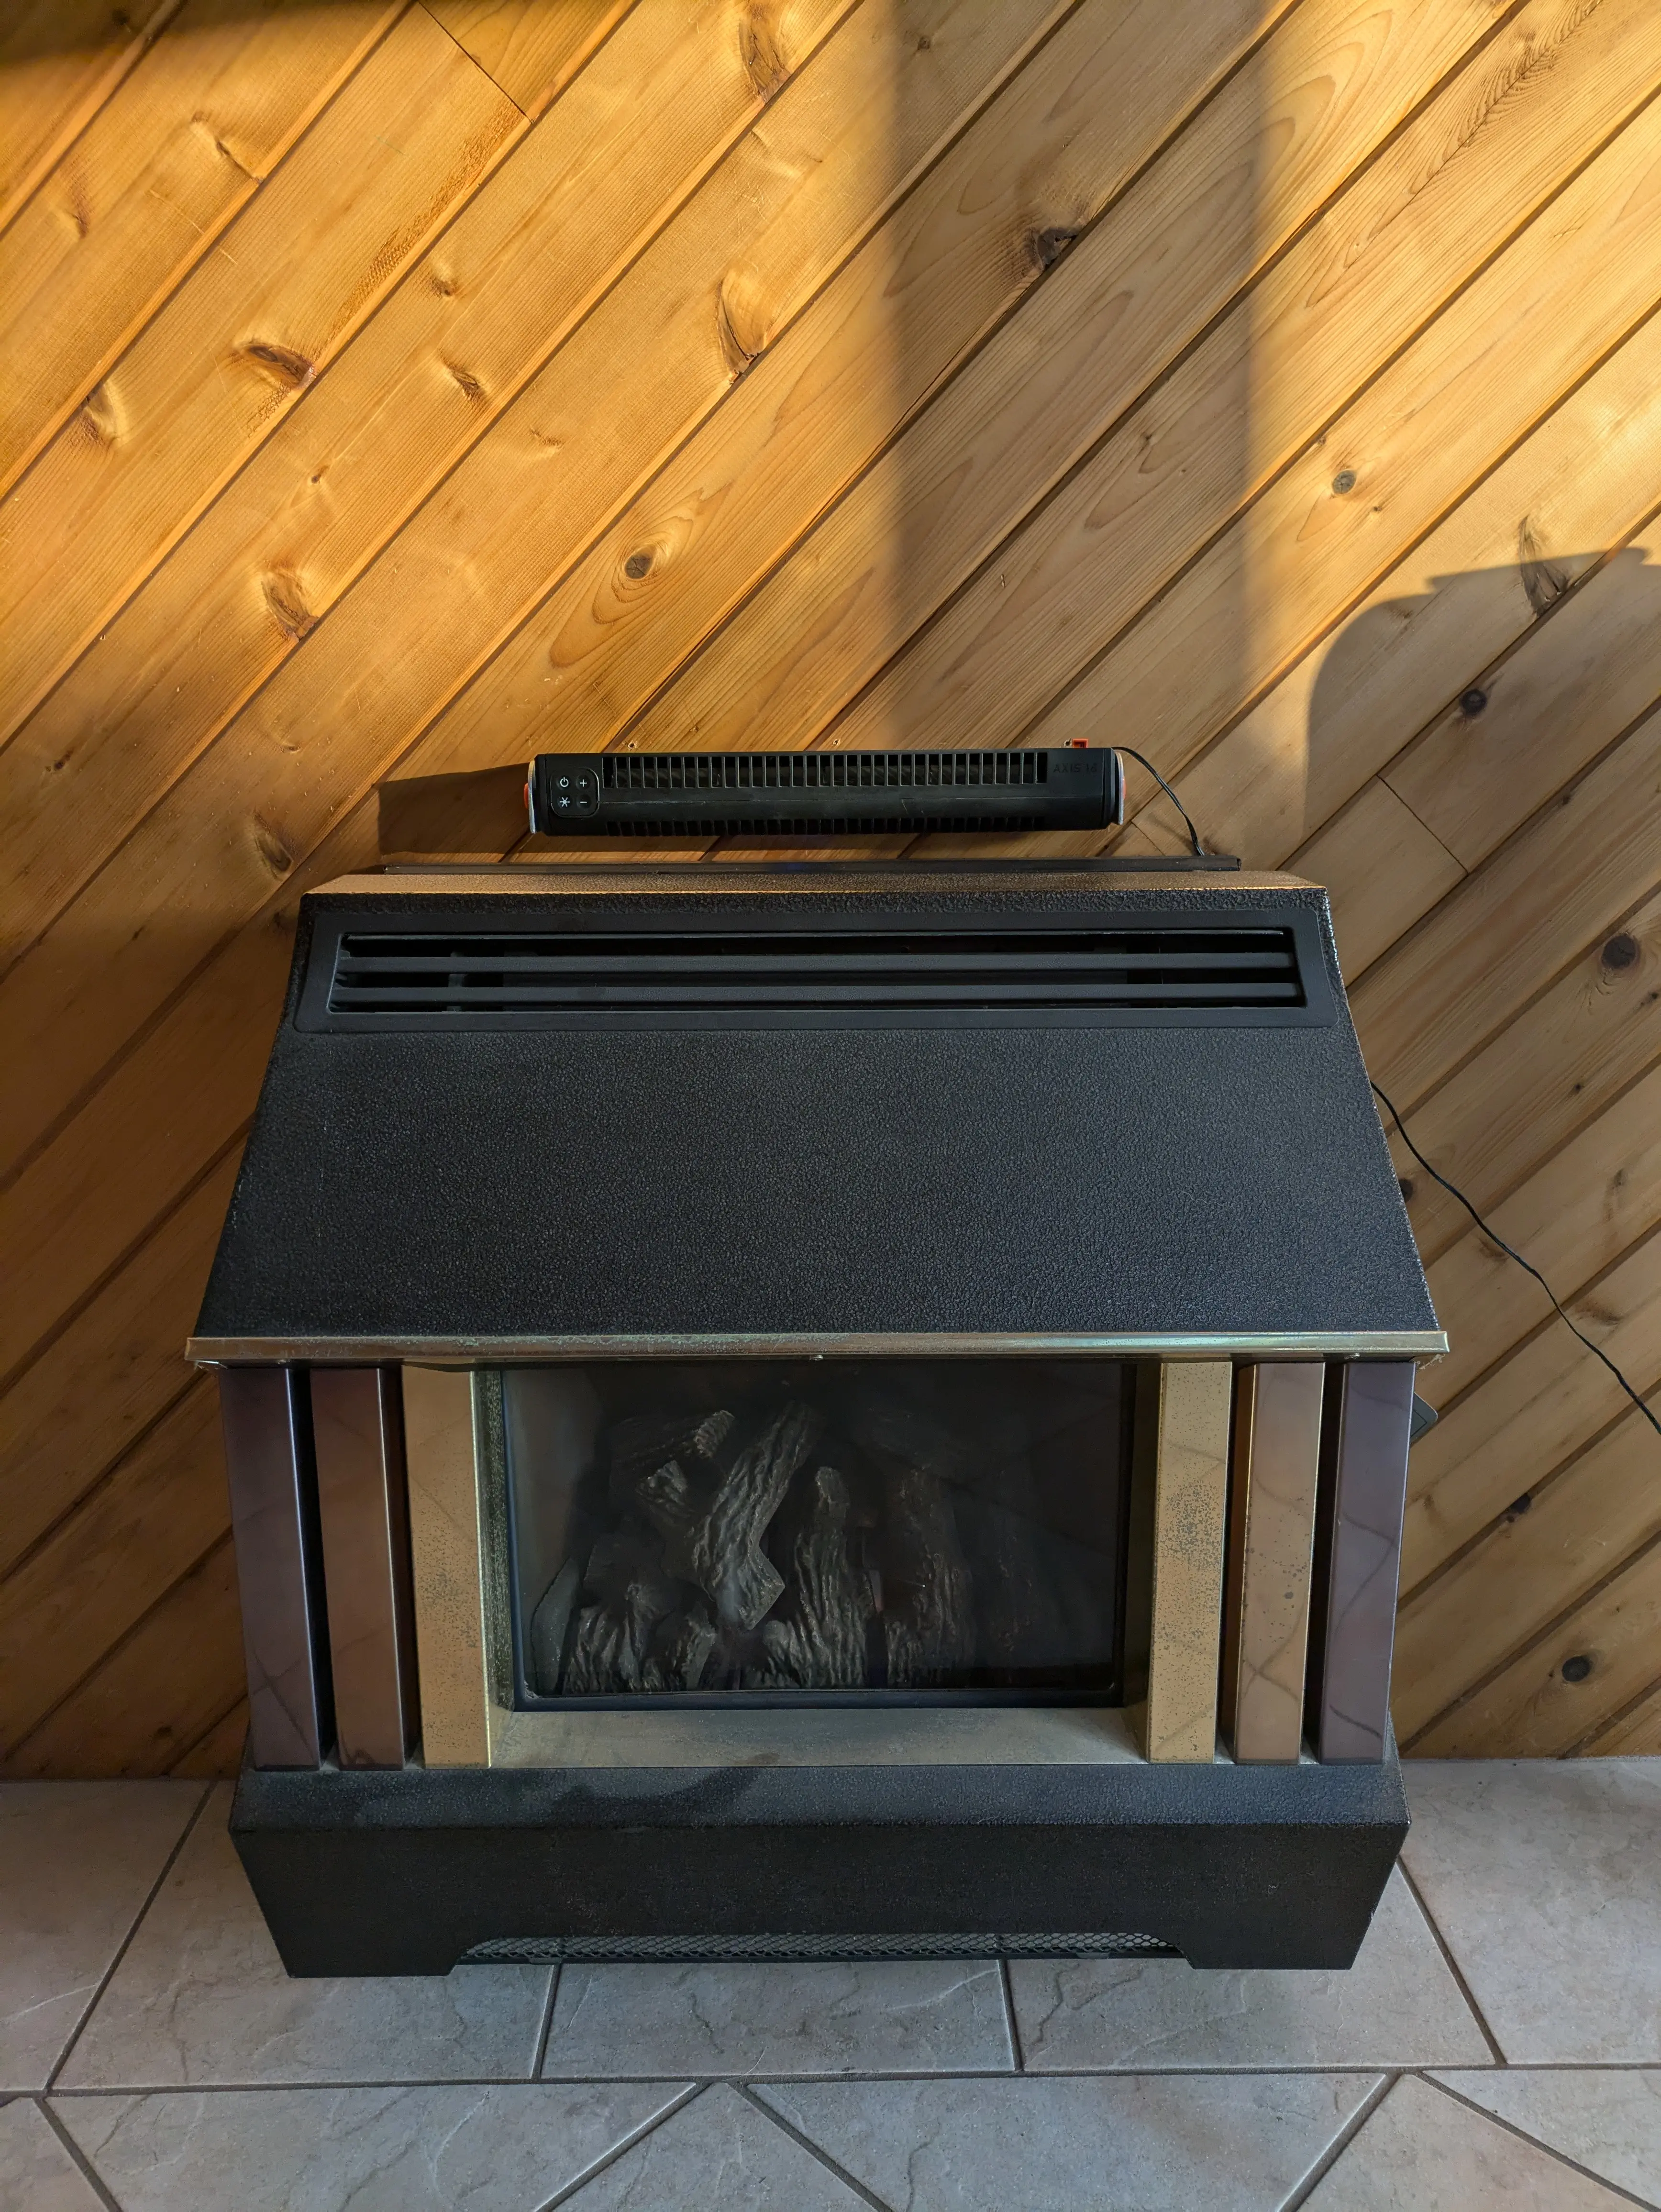
I have previously experimented with a few different fans, but they were either too loud, too ugly or not very effective as they were either in front or on the side of the unit. I believe the best way to circulate the heat and still be somewhat aesthetically pleasing is to have a fan on the top of the fireplace that aims slightly downward. They just don’t seem to make long and narrow fans like that – like a tower fan but horizontal. But after some research, I found the Sharper Image Axis 16. They market it as an Airbar and it can be oriented either vertically or horizontally. As a bonus it comes with an aluminum stand, which I could easily mount to the wall. However it’s only 16" wide, a little shorter than the fireplace, but I think it will work well.

Teardown Link to heading
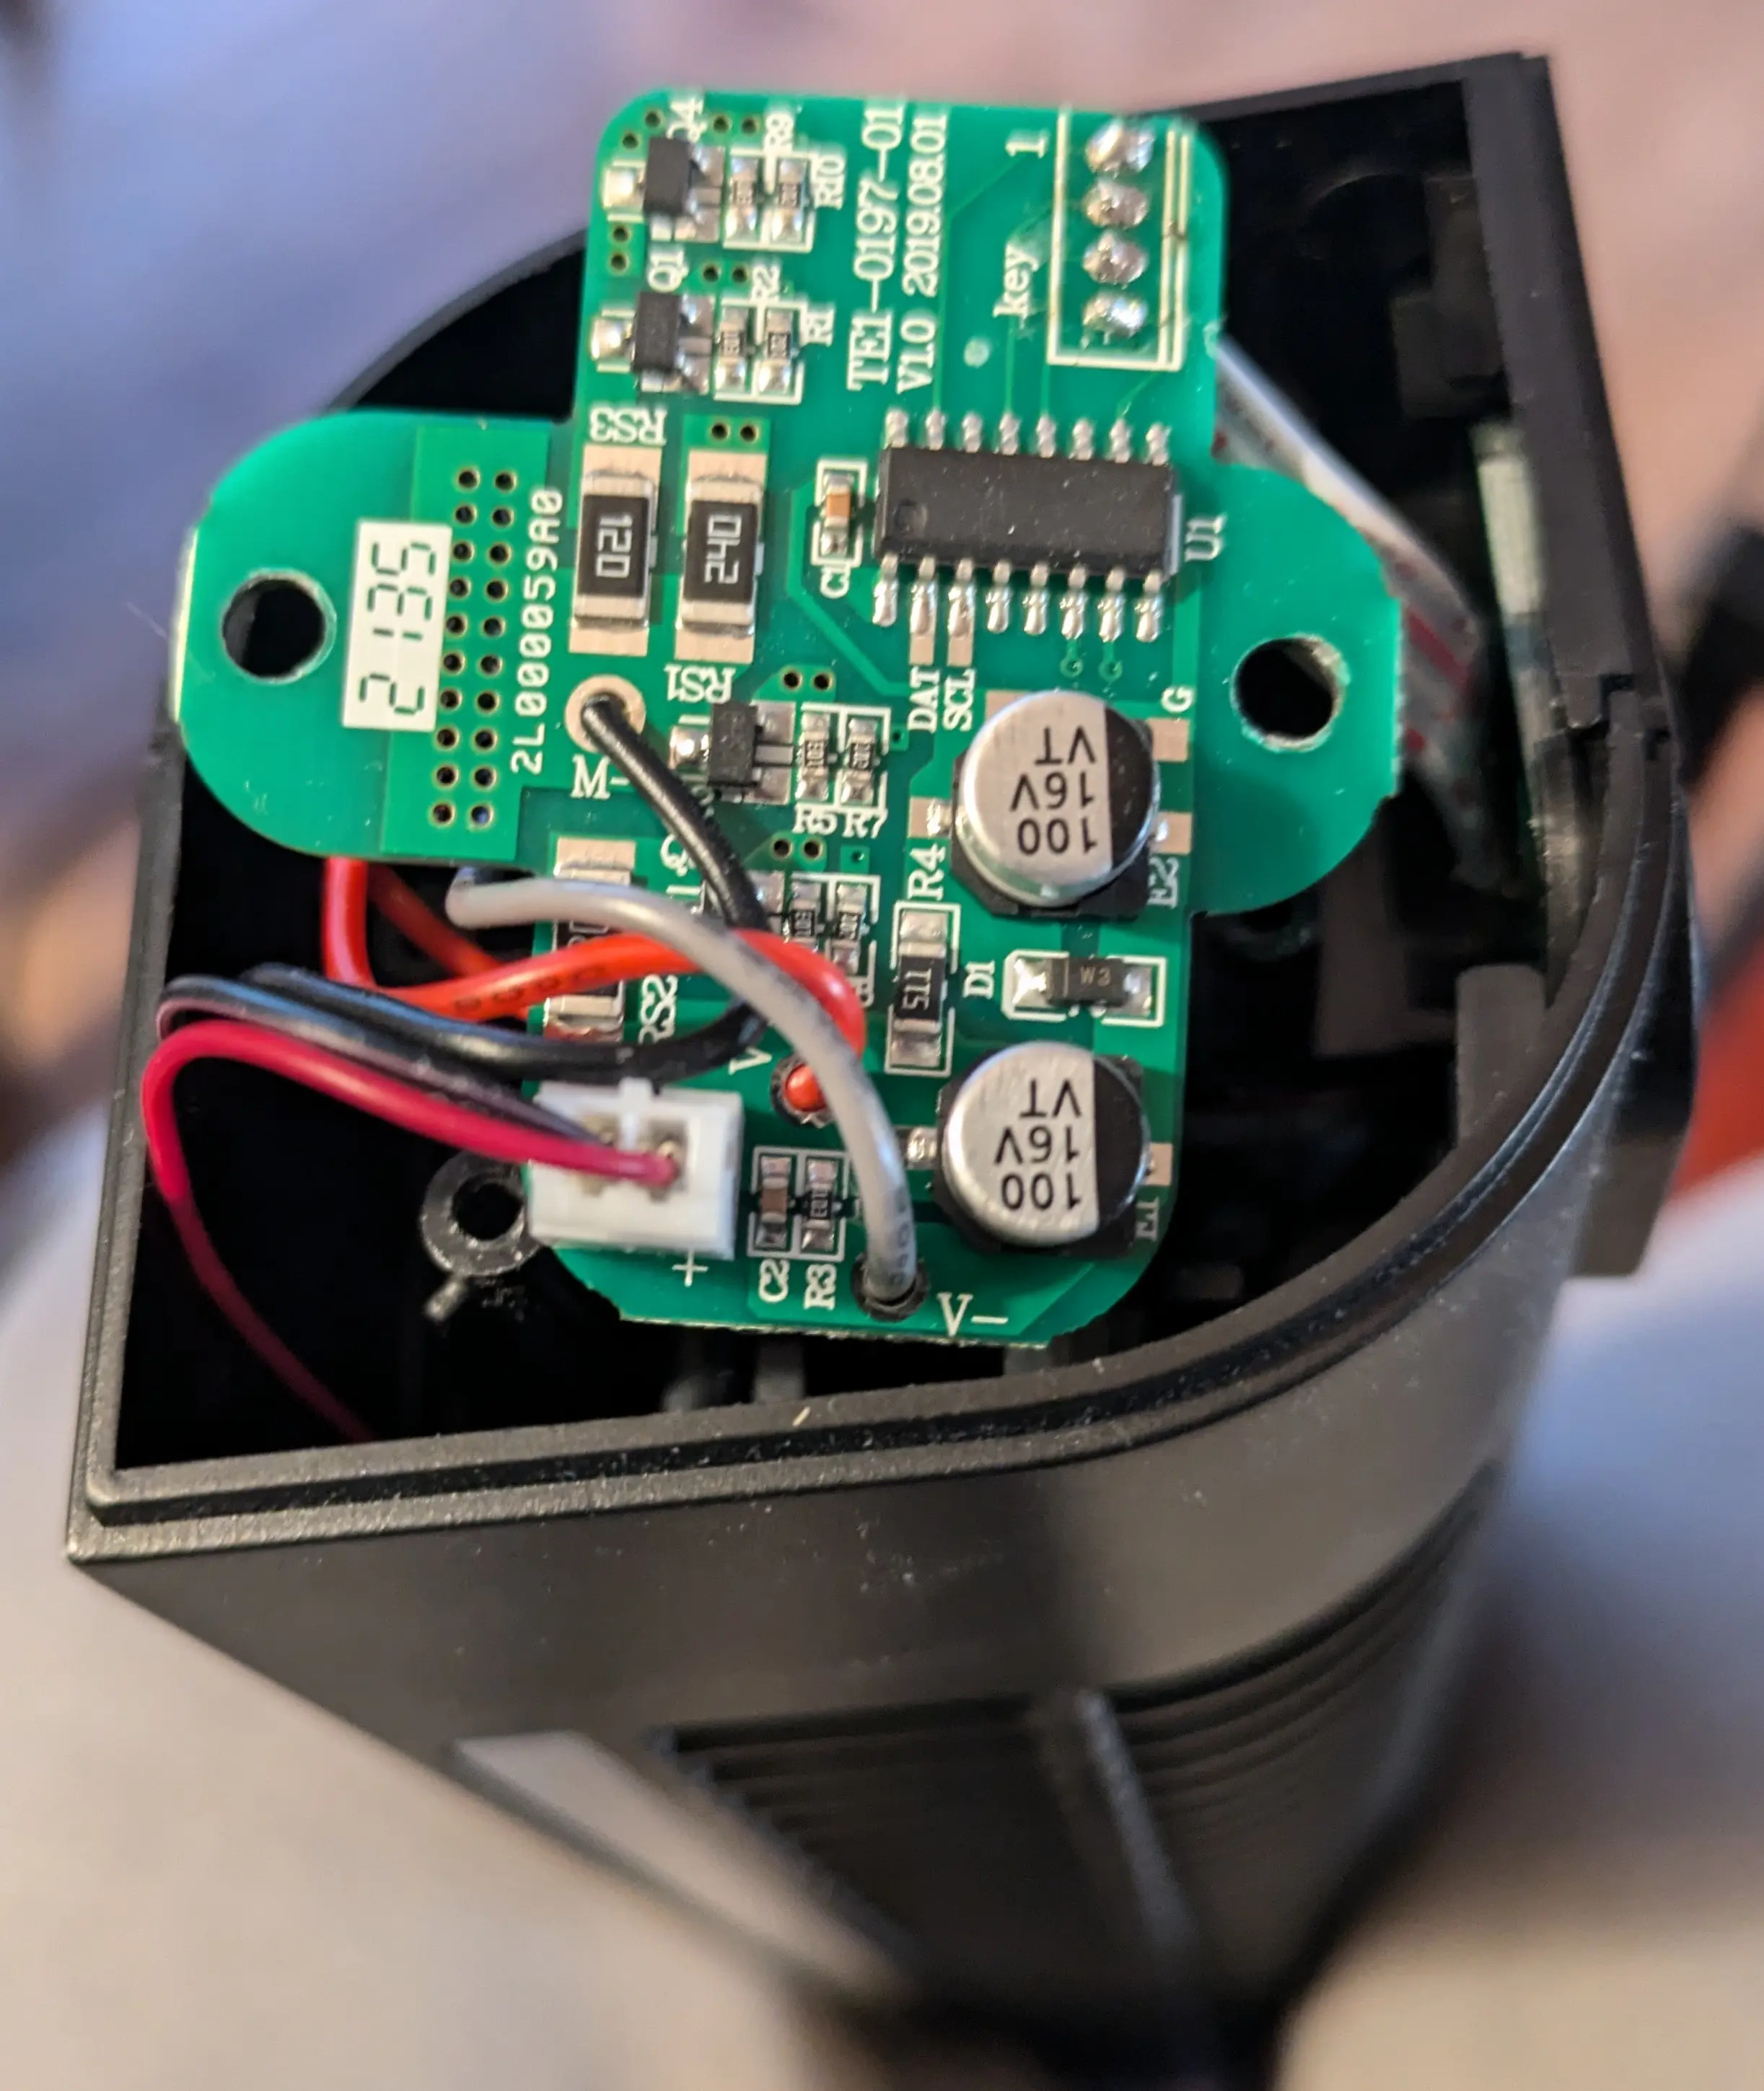
The fan has three built-in speeds controlled via a touch panel on the front and runs at 12v, so I figured it should be relatively easy to control. I started by taking the fan apart to see what I was working with. It is held together by four screws, two per side, and pops apart easily.

The fan is controlled by a single PCB. Using a multimeter and watching the voltage while adjusting the fan speed, I can see a voltage drop on the black (M-) wire, while the grey (V-) is a constant 12v. So it looks like the black wire is the ground, and the grey wire is controlling the fan speed. I’m not at all a hardware guy, but after some quick research, it seems very common to control 12v fans with PWM (Pulse Width Modulation), and this appears to be a 2-wire configuration. That means, by varying the duty cycle of the 12v signal, I should be able to control the speed of the fan.
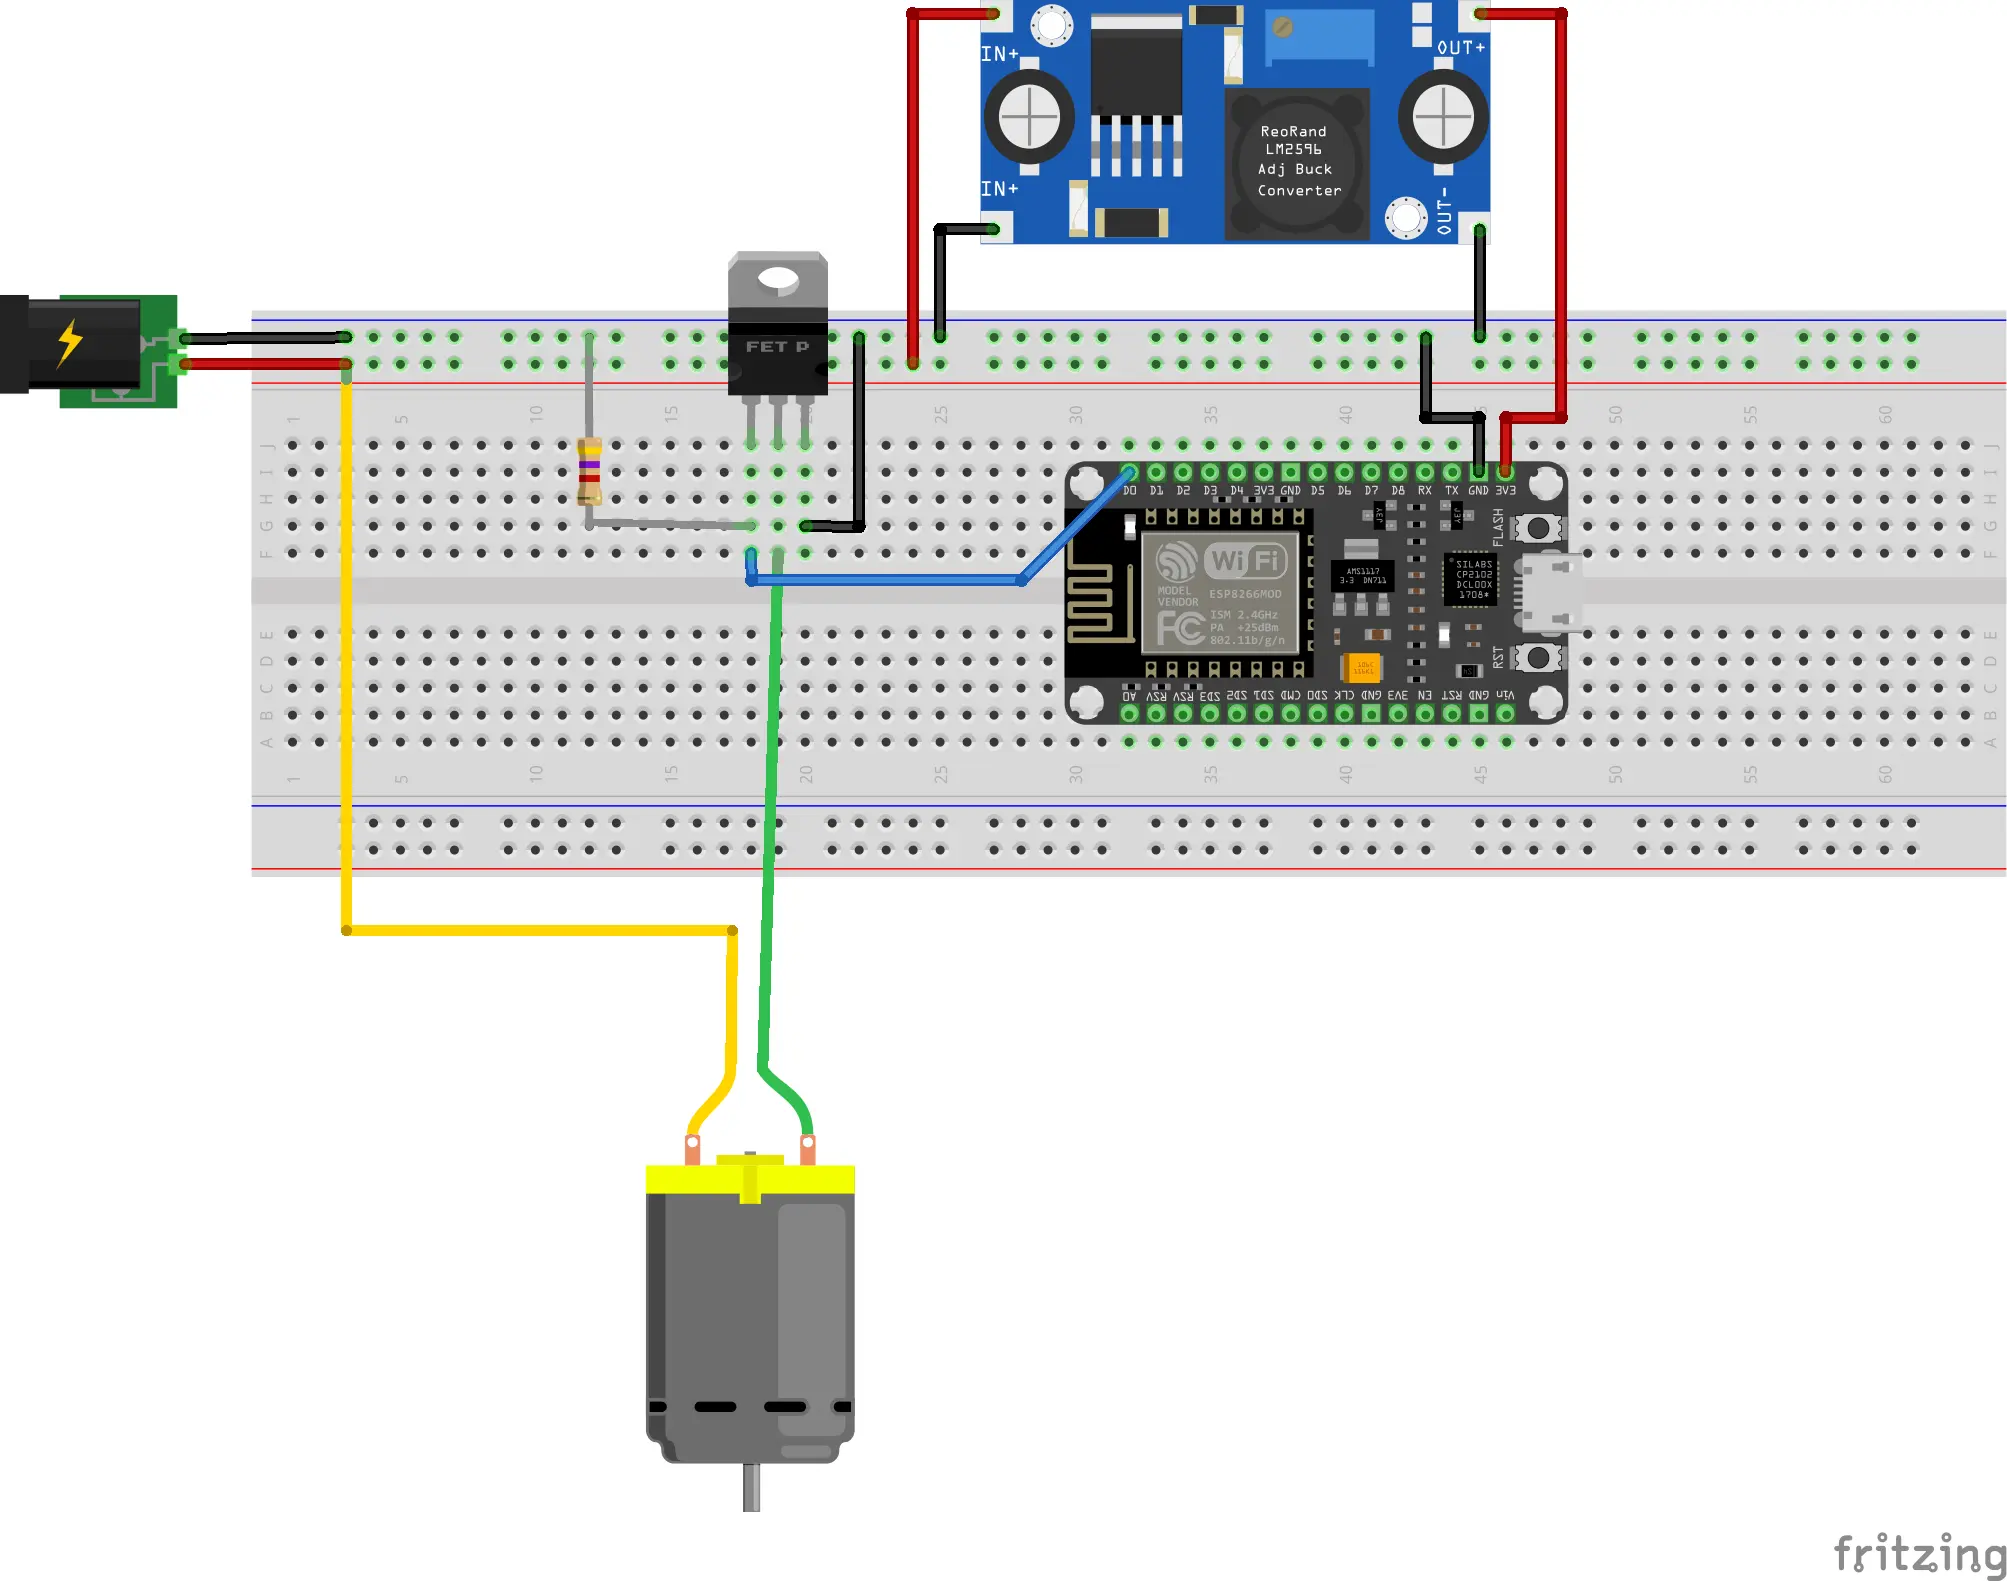
To test out this theory, I soldered some jumper wires to the fan and connected it an old NodeMCU (ESP8266) I had laying around. I had to make sure to power the fan with 12v, and the ESP8266 with 3.3v. The parts list for this project is as follows:
- An ESP8266, I used a NodeMCU.
- A P channel MOSFET, I used a NDP6020P.
- A 4.7k resistor.
- A cheap LM2596 based buck converter.

A quick test with the following code confirmed my theory:
#include <Arduino.h>

#define LED 2            // Led in NodeMCU at pin GPIO16 (D0).
#define FAN_PIN 16

void setup() {
  pinMode(LED, OUTPUT);    // LED pin as output.
  pinMode(FAN_PIN, OUTPUT);
}

void loop() {
  digitalWrite(LED, LOW);

  analogWrite(FAN_PIN, 0);
  delay(5000);
  digitalWrite(LED, HIGH);

  analogWrite(FAN_PIN, 127);
  delay(5000);

  analogWrite(FAN_PIN, 63);
  delay(5000);

  analogWrite(FAN_PIN, 31);
  delay(5000);
}
And to my surprise, it worked! The fan speed changed as expected. Even at low speed (lower than the preconfigured lowest speed), the fan is still louder than I was hoping for, but I think it will be fine.
!!Warning When uploading the code to the ESP8266, make sure the fan power is disconnected.
ESPHome Link to heading
Knowing everything is wired up properly, the next step is to integrate it into my Home Assistant setup. The following config is what I ended up with:
esphome:
  name: fireplace-fan

esp8266:
  board: d1
  framework:
    version: recommended

web_server:
  port: 80

# Enable Home Assistant API
api:
  encryption:
    key: !secret encryption_key

ota:
  password: !secret ota_password
  platform: esphome

wifi:
  ssid: !secret wifi_ssid
  password: !secret wifi_password

  # Enable fallback hotspot (captive portal) in case wifi connection fails
  ap:
    ssid: "${name} Fallback Hotspot"
    password: !secret fallback_password


output:
  - platform: esp8266_pwm
    id: pwm_output
    pin: 16
    frequency: 1000 Hz

fan:
  - platform: speed
    output: pwm_output
    name: "Fireplace Fan"%
And that’s it! I now have a smart fan that I can control via Home Assistant. I have it configured to turn on at night and to shut off in the day. It likely will not make a meaningful difference, but at least it was fun to play with.
